1. Protect Your Space
Cover furniture & flooring with drop cloths to prevent dust/debris damage.
Did you know that proper wall preparation can make or break your wallpapering project? It’s the foundation that sets the stage for a stunning finish!
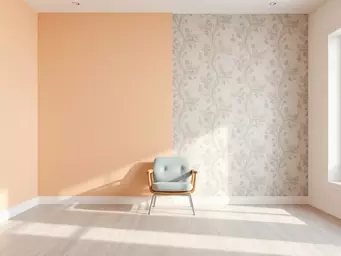
Transforming your walls for wallpaper involves a series of critical steps, from initial protection to final priming. This visual guide outlines the essential process to ensure a flawless and long-lasting finish.
Cover furniture & flooring with drop cloths to prevent dust/debris damage.
Wipe down walls to remove dust, grease, and grime. Ensure they are dry.
Fill small holes, cracks, & dents with spackle. Sand smooth once dry.
Remove old wallpaper or paint using scrapers or steamers for strong adhesion.
Apply a mist coat or suitable primer to seal porous surfaces for adhesion.
Use measuring tools for precision, adding extra inches for trimming.
Welcome to your step-by-step guide on preparing walls for wallpapering! At Painter & Decorator Watford, I understand that the key to a stunning wallpaper installation begins long before the wallpaper itself comes out of the roll. With proper wall preparation, you not only enhance the appearance of your space but also ensure the longevity of your wallpaper. Let’s dive into how you can transform your walls into a canvas ready for your design vision!
Before we roll up our sleeves for some wallpaper magic, let’s talk about why proper wall preparation is a must. It’s not just about aesthetics; it’s about creating a solid foundation that supports your wallpaper, ensuring it looks fabulous for years to come.
When you take the time to prepare your walls, you set the stage for a flawless finish. Here are some reasons why preparation is critical:
By investing time in these initial steps, you’ll save yourself from potential headaches down the road! For more detailed guidance on surface preparation, the Wallcovering Contractors Association provides comprehensive resources on ensuring proper adhesion and finish.
Watford homes can present unique challenges when it comes to wall preparation. Some common issues include:
Addressing these challenges head-on can make a world of difference in your wallpapering project!
The texture of your walls plays a crucial role in how well wallpaper adheres. Textured surfaces can create pockets that trap air or moisture, leading to peeling. For the best results:
Taking the time to assess and prepare your wall texture will pay off during the installation process! For deeper insights into preparing various surfaces for wallpaper, you can refer to professional painting and decorating guidelines which often cover techniques for different wall types.
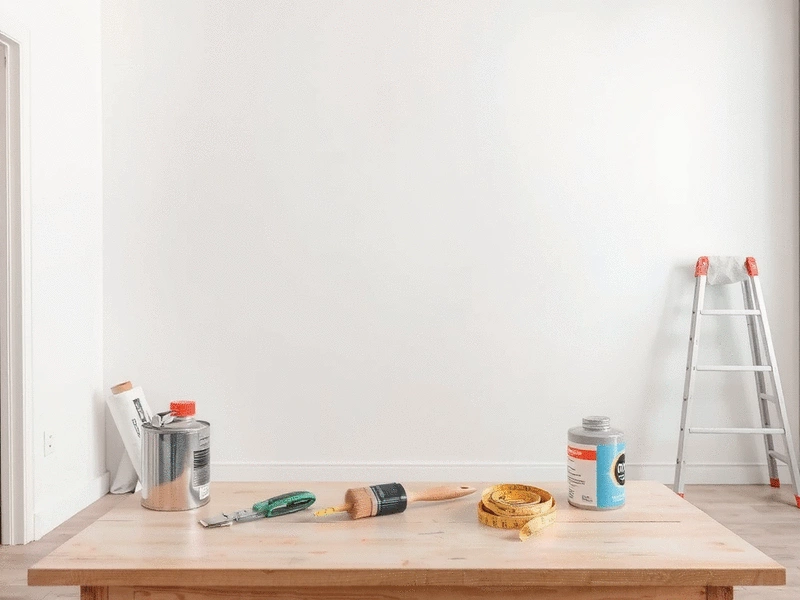
Now that we’ve covered the importance of wall preparation, let’s gather our tools and materials to ensure a successful project. Having the right items on hand can make the process smoother and more efficient.
With these tools ready, you’ll be well-equipped to tackle any wall preparation tasks!
Selecting the right primer is crucial, especially considering the local climate. Here’s what to look out for:
Finding the right primer will set your wallpapering project up for success!
If you’re planning to tackle the wallpapering yourself, consider these must-have tools:
With these tools in your arsenal, you’ll be on your way to achieving a professional-looking finish!
Ready to roll up your sleeves? Let’s walk through the step-by-step process for preparing your walls for wallpaper.
First things first, let’s protect your furniture and flooring. Use drop cloths to cover any surfaces that may be affected by dust or debris during preparation.
A clean wall is crucial for effective adhesion! Use a damp cloth to wipe down the walls, removing dust and grease. For stubborn stains, consider using a gentle cleaning solution. Make sure everything is dry before moving on!
Take a close look at your walls for any imperfections. Small holes, cracks, or dents can be filled using spackle. Here's how:
Apply spackle to holes with a putty knife, ensuring it’s evenly spread and slightly raised. Allow it to dry completely before sanding smooth.
Once the spackle is dry, sand the area until it’s flush with the wall. This step is essential for achieving a seamless look!
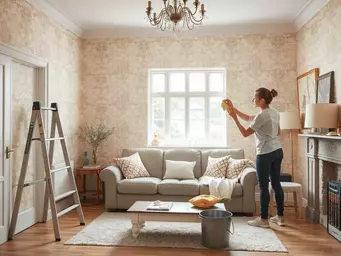
If you’re working over old wallpaper or paint, it’s crucial to remove these layers. This ensures a strong bond for the new wallpaper.
Use a wallpaper scraper or a steamer to gently lift away old wallpaper. Be patient—rushing can damage your walls!
Whenever possible, opt for eco-friendly wallpaper strippers. They are less harsh on both your walls and the environment.
Different surfaces may require different techniques for removal. For example, drywall may need more gentle care, while less porous surfaces can handle a bit more scrubbing.
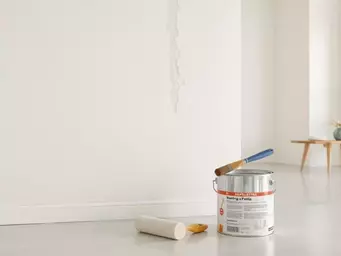
Before applying wallpaper, it’s important to prime new plaster to ensure the best adhesion.
A mist coat is a diluted primer that allows paint or wallpaper to adhere properly. It helps seal the porous surface of new plaster.
Make sure to select a primer suitable for your wall type—this will significantly affect the final result!
Accurate measurements can save you time and materials! Measure your walls carefully before cutting the wallpaper.
Use your measuring tape to determine the height and width of each wall. Be sure to add a couple of extra inches to your measurements for trimming.
A wallpaper trimmer helps you achieve clean edges, making for a neater finish. It’s a handy tool to have when cutting rolls to size!
Every area has its quirks, and Watford's climate can influence your wallpapering process. Understanding these local conditions can guide your preparation.
Humidity can be a challenge in some seasons. Be sure to check for any damp spots on your walls and treat them accordingly before proceeding. The Region of Waterloo's practical guide emphasizes the importance of addressing moisture issues, which is a valuable lesson for any climate, including Watford's.
If you live in a period home, the walls might have their own character—often with unique textures or finishes. Adapting your preparation to these features is crucial for success!
For rental properties, you may need to consider temporary wallpaper options or less invasive methods. Keeping your landlord’s guidelines in mind is always a smart move!
Even with the best planning, challenges can arise. Here are some common issues and solutions.
If you discover cracks or old paint layers during preparation, don’t panic! These can be addressed with proper techniques that will ensure a smooth finish.
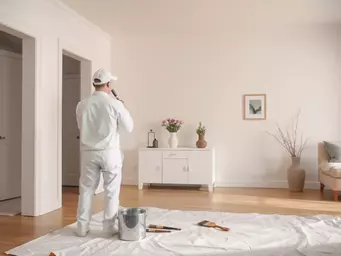
If you feel overwhelmed at any stage, remember that it’s perfectly fine to enlist professional help. At Painter & Decorator Watford, we’re here to ensure your wallpapering experience is stress-free!
Familiarizing yourself with common wallpapering mistakes can save you time and frustration. Pay close attention to installation methods and always follow manufacturer instructions.
Did you know? Taking the time to let your primer dry completely before applying wallpaper can significantly enhance adhesion. This simple step can prevent peeling and ensure your wallpaper remains flawless for years to come!
A1: Proper wall preparation is crucial for ensuring strong adhesion, long-term durability, and a flawless aesthetic finish for your wallpaper. It prevents issues like peeling, bubbling, and uneven surfaces that can detract from the final look.
A2: Watford homes often face challenges such as moisture buildup due to local climate, uneven surfaces, especially in older properties, and remnants of old paint or wallpaper that can interfere with new installations.
A3: Essential tools include a wallpaper scraper for old layers, spackle and a putty knife for repairs, a sanding block for smoothing, and a measuring tape for accurate dimensions.
A4: For Watford's climate, consider moisture-resistant primers. High-quality acrylic primers offer excellent adhesion, and stain-blocking primers are useful for discolored walls. Always match the primer to your specific wall type for the best results.
A5: It's generally best to remove old wallpaper for optimal adhesion. For textured walls, you may need to smooth out uneven areas with spackle and sanding, or choose wallpapers specifically designed for textured surfaces, along with a suitable primer to ensure proper adherence.
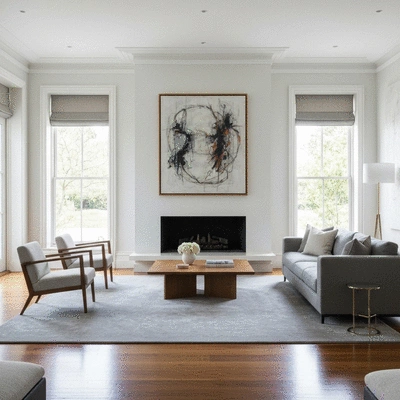
As we conclude this guide on preparing walls for wallpaper in Watford homes, it's important to reflect on the key steps we've discussed. Proper wall preparation not only ensures a stunning finish but also enhances the longevity of your wallpaper. So, take a moment to appreciate the work you're about to undertake!
Remember, each step is crucial, from cleaning your walls to priming effectively. By investing time in preparation, you set yourself up for a successful wallpaper application that will transform your space.
Here are some essential tips to keep in mind as you embark on your wallpapering project:
By following these tips, you'll not only achieve a beautiful look but also enjoy the process! It’s all about creating a space that reflects your personality.
Choosing the right wallpaper adhesive is vital for ensuring your new wallpaper sticks well and lasts for years to come. Here are a few factors to consider:
With the right adhesive, your wallpaper will not only look good but be firmly in place, even in Watford's changing weather!
If you’re looking for more guidance on wallpapering, check out these resources:
At Painter & Decorator Watford, we're always here to help! Whether you need materials, advice, or professional services, don’t hesitate to reach out!
Have you recently tackled wallpapering? I'd love to hear about your experiences! Feel free to share your challenges and triumphs in the comments below.
And if you have any questions, ask away! I’m here to help make your wallpaper project a success.
When you're ready to start your project, consider visiting some local suppliers in Watford. They usually offer a great variety of wallpaper and can provide valuable advice tailored to our local climate conditions.
Plus, many of them have knowledgeable staff who can help you choose the perfect materials for your home!
Finally, keep an eye on the latest design trends! Following local interior design blogs or social media pages can inspire your next project. Whether it’s the latest wallpaper patterns or color schemes, staying informed will help you make the best choices for your space.
At Painter & Decorator Watford, we are passionate about helping you achieve your design dreams. Let's create a beautiful home together!
Here is a quick recap of the important points discussed in the article:
Jacob Ashford is a seasoned painter and decorator based in Watford, with a passion for transforming spaces into stunning showcases. With years of hands-on experience, Jacob is committed to delivering high-quality finishes and exceptional customer service. His expertise spans both residential and commercial projects, making him a trusted choice for all painting and decorating needs in Hertfordshire.

